
If you’ve ever wished you could change the icon Windows uses for a drive in File Explorer, then you’re in luck. We have two ways to show you how to do just that.
Changing your drive icons is just one of the many ways you can customize your icons in Windows. You can even make high-resolution icons out of your own images if you can’t find other icons you like. We’ve got two ways you can change drive icons in Windows. The first way uses a free third-party app to let you change the icon for an individual drive. The second way involves a couple of quick edits to the Windows Registry.
Option One: Change an Individual Drive Icon with Drive Icon Changer
The easiest way to change the icon for an individual drive is with a free tool named Drive Icon Changer. It was originally written for Windows Vista but it also works in Windows 7, 8, and 10 to let you quickly change the icon for any drive.
After you download and extract the program, you’ll need to run it with administrative privileges. Right-click the EXE file and choose “Run as administrator.” The first time you run the tool, it may ask you to install some .NET Framework files, so go ahead and let it do that. It’s also a portable app, so there’s no installation necessary.
After running it, you’ll see that Drive Icon Changer has only one screen where you select the drive for which you want to change the icon and then browse for the ICO file you want to use. There are no additional settings available. Select your drive, find your ICO file, and then click the “Save” button. In our example, we’re using a set of wooden drive icons from IconArchive.
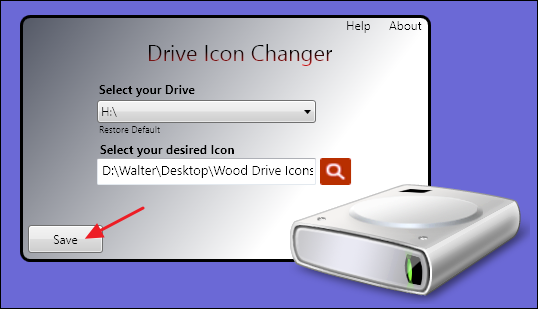
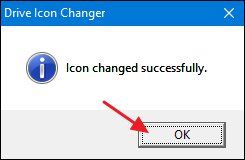
You’ll get a notification that the icon has been changed successfully.
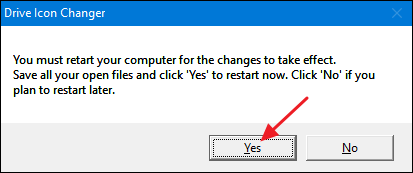
You’ll then need to restart your PC for the change to take effect if you selected an internal drive. If you selected a removable drive, you can also just disconnect and reconnect it. If you’re changing the icons for multiple drives, you can also wait and restart your PC when you’re done with all of them.
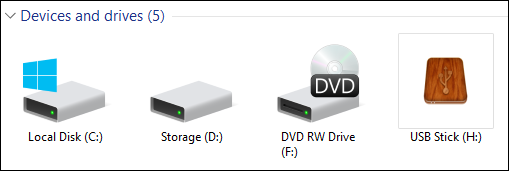
After restarting, you should see your new drive icon in File Explorer.
Drive Icon Changer works by creating two hidden files on the root directory of whatever drive you select. One is a copy of the ICO file that gets renamed to “Drive.ico” and the other is a simple autorun.inf file that contains only the following lines:
[autorun]
ICON=Drive.ico

So, if you prefer, you could just create that autorun.inf file yourself using Notepad, copy the ICO file to your drive and rename it, restart your PC (or disconnect and reconnect the drive if it’s removable), and the drive icon would change. The tool just makes it a bit easier.
And if you want to reverse the changes you’ve made to a drive, all you have to do is delete those two files.
NOTE: Since this works by saving files to the drive, optical drives are tricky. You won’t be able edit the image used for an empty optical drive or the image used when a finalized disc is inserted. You can, however, change the image for a rewritable drive or a writeable drive you haven’t finalized yet. You can change optical drive icons using the instructions in the next section, though.
Change an Individual Drive Icon by Editing the Registry
While changing an individual drive icon is much easier using Drive Icon Changer, you can also make a similar change by editing the Registry. Why go through the extra effort? Well, you might have some autorun restrictions in place that don’t let you use the first method, or you might want to change the icon used for an optical drive. Maybe you don’t like the idea of letting an app do what you can do yourself. Or maybe you’re just curious to see where this stuff is in the Registry. At any rate, the changes are really pretty easy and they work in Windows 7, 8, and 10.
Standard warning: Registry Editor is a powerful tool and misusing it can render your system unstable or even inoperable. This is a pretty simple hack and as long as you stick to the instructions, you shouldn’t have any problems. That said, if you’ve never worked with it before, consider reading about how to use the Registry Editor before you get started. And definitely back up the Registry (and your computer!) before making changes.
Open the Registry Editor by hitting Start and typing “regedit.” Press Enter to open Registry Editor and give it permission to make changes to your PC.

In the Registry Editor, use the left sidebar to navigate to the following key:
HKEY_LOCAL_MACHINE\SOFTWARE\Microsoft\Windows\CurrentVersion\Explorer\DriveIcons

Next, you’re going to create a new key inside the DriveIcons key. Right-click the DriveIcons key and choose New > Key. Name the new key using the drive letter you want to change. In our example, we’re changing drive H.

NOTE: As you probably noticed, this method differs from using Drive Icon Changer in that, instead of using the autorun feature, you’re actually assigning the icon to a drive letter. For that reason, you may not get the results you want with removable drives. This especially holds true if you use multiple reusable drives and the letters change often. To get around this, you can assign static drive letters to your removable drives.
Now, you’re going to create another new key, this time inside the drive letter key you just created. Right click the key you named after your drive letter and choose New > Key. Name the new key “DefaultIcon.”

Select the new DefaultIcon key in the left pane and then, in the right pane, double-click the (Default) value to open its properties window.

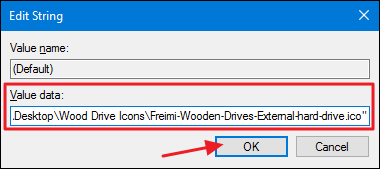
In the “Edit String” window, type the full path (surrounded by quotes) for the ICO file you want to use as your icon into the “Value data” box and then click “OK.”
The changes should take effect immediately, so you won’t need to restart your PC. Open File Explorer—or refresh the window if it was already open—and you should see the new drive icon.

If you want to reverse the changes, just head back to the DriveIcons key in Registry Editor and delete the drive letter key you created.


0 comments:
Post a Comment